[EC2] 2 ways to expose Docker Daemon to the Internet & Why | Raeveen Pasupathy
Before we start, I’m assuming that you have had adequate knowledge & understanding on setting up Security Groups, Exposing Ports, Basic…
![[EC2] 2 ways to expose Docker Daemon to the Internet & Why | Raeveen Pasupathy](/content/images/size/w1200/2024/12/1-b45wh7hhexzq88gsfxtnda.png)
[EC2] 2 ways to expose Docker Daemon to the Internet & Why
Before we start, I’m assuming that you have had adequate knowledge & understanding of setting up Security Groups, Exposing Ports, Basic Configuration of the Server through the Panel.
—
What is Docker?
Docker is a set of platforms as service products that use OS-level virtualization to deliver software in packages called “Containers”. However, Containers are isolated from each other and bundled with their own software, libraries, and configuration.
In short, let’s denote Containers as a room with 4 walls surrounding it. The room contains furniture, and that furniture is specific to the room.
—
What is a Docker Container?
Docker Containers are just a set of standardized which can be created on the fly to deploy a particular application or environment. It can be anything, such as Ubuntu, CentOS, etc. Or even application-oriented such as CakePHP, Tomcat, etc.
—
Should I secure my Docker Daemon?
YES! But this is totally up to you. In this article, I will be going through 2 ways; One is the usual “Open to the world (Not Secure)” and the “TLS way of connection (Secure)”.
—
Okay, let’s start
Before we begin, be mentally prepared
Just kidding, just follow along the steps listed below.
Step 1: The Introduction
We’ll need to acquire a Server, this can be any kind; VPS, Dedicated Server, etc. As long as it is a Server, we good and gucci!
In this article, I’m going to acquire an EC2 from Amazon AWS.
— — — — —
Step 2: Acquiring our Server
Head over to Amazon AWS Console.
—
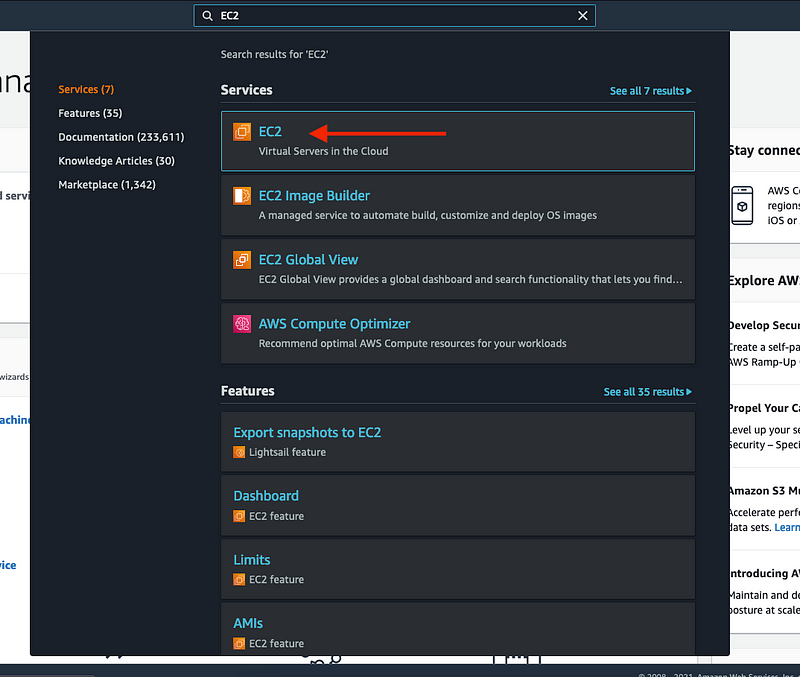
Then, search and navigate to EC2.
—
Then, launch a new instance of your liking. In this article, I’m going to a cheap EC2 Server Configuration (Free Tier Compatible).
EC2 Details:
Name: t2.micro
OS: Ubuntu 20.04 (LTS)
Memory: 1GB
Storage: 8GB (EBS Only)
—
Then, breeze through the setup & take a deep breath at the Security Group Page.
Please ensure your Security Group Configuration is as below:

NOTE: Please ensure Port 22 is allowed for “0.0.0.0/0” (Allow all IPv4) in order for you to SSH to the EC2. If you have a Static IP Internet Connection, then you may restrict it to work ONLY for your IP.
—
Then, woila! Choose your preferred Keypair configuration for your EC2 and launch it up.
NOTE: Please keep the .pem file safe at all times! That file serves as the credential to your EC2.
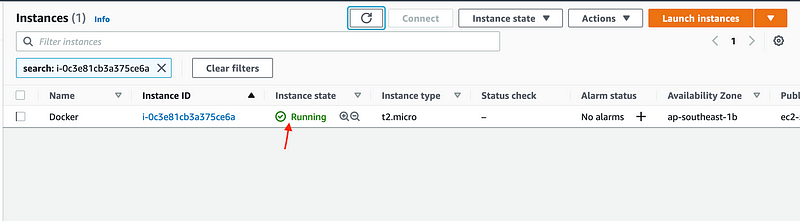
Okay, then please check if your EC2 is actually “Online”!
— — — — —
Step 3: SSH to your EC2
Well, as you guys might have some experiences already with SSH-ing to a Server (Assuming).
Let’s get going!
NOTE: You will have to use the .pem file to authenticate to the Server.# Open up your Terminal / Favorite SSH Client# If you are facing issues as "Bad Permission" while trying to authenticate, please change the file permission as below;
chmod 600 my-keypair.pem# Then, run this command to connect to the EC2 Server.
ssh -i "my-keypair.pem" ubuntu@Your Public iPv4 DNSExample:
ssh -i "my-keypair.pem" ubuntu@ec2-18-140-70-118.ap-southeast-1.compute.amazonaws.com
—
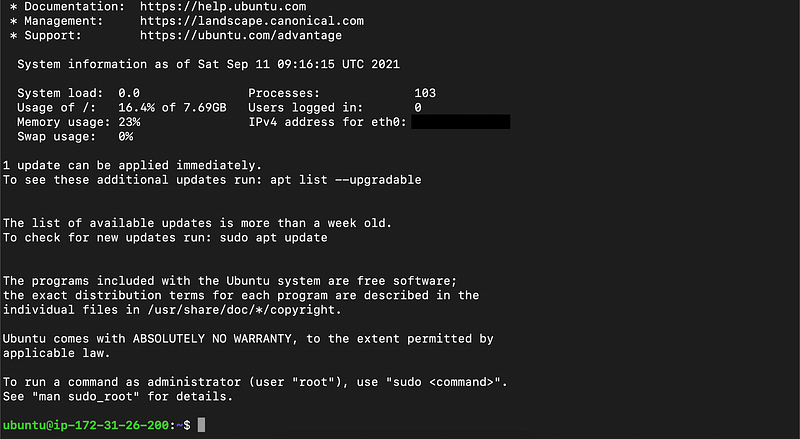
And yeah, once you have logged into your EC2. You’ll be greeted with the Shell Context of the EC2.
Example:
— — — —
Step 4: Installing Docker
There are few steps / commands that needs to be executed for Docker to be successfully installed.
Follow along!
—
Updating your apt is one of the most crucial elements before installing a Package.sudo apt update
—
Upon updating your apt, you are required to install a few per-requisite packages to allow apt to use packages over HTTPS.sudo apt install apt-transport-https ca-certificates curl software-properties-common
—
Then, add the GPG Key for the official Docker repository to your systemcurl -fsSL https://download.docker.com/linux/ubuntu/gpg | sudo apt-key add -
—
Add the Docker repository to apt sourcessudo add-apt-repository "deb [arch=amd64] https://download.docker.com/linux/ubuntu focal stable"
—
Next, update the package database with the Docker packages from the newly added reposudo apt update
—
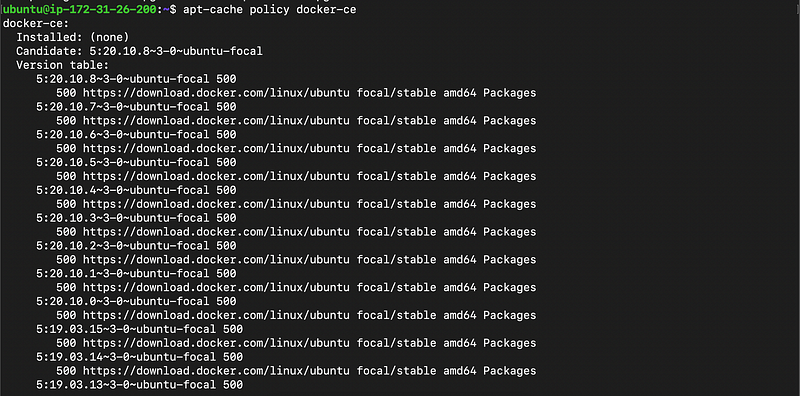
Make sure you are about to install from the Docker repo instead of the default Ubuntu repo.apt-cache policy docker-ce
Upon executing this command, you will see the Output as below. It is okay if the version number is different.
—
Finally, install Docker!sudo apt install docker-ce
—
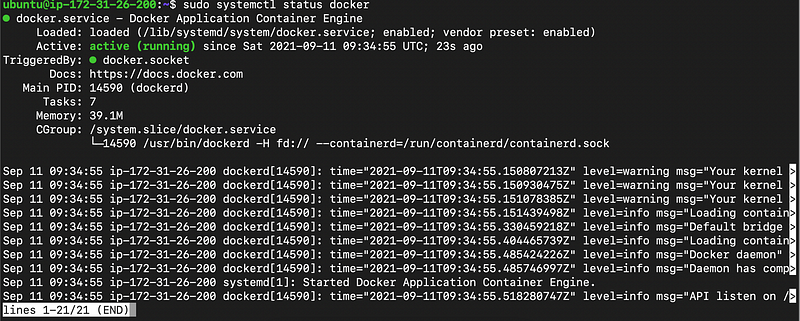
Now, run the command below to check if the Docker Daemon is successfully “Online”.
— — — —
Step 5: Exposing Docker Daemon to the Internet
NOTE:
This method can be wild, and prone to be misused by unauthorized parties. I do not suggest this method should you run a Service.
Currently, the Docker Daemon is running under the instance below, which also means that the Docker Daemon only identifies connection that is done to the REST API or TCP from a local instance (127.0.0.1).
Example:/usr/bin/dockerd -H fd:// --containerd=/run/containerd/containerd.sock
—
However, in this section, we’re going to learn on how to “expose” your Docker Daemon to the Internet. Once again, under your own risk.
Docker’s Daemon by default accepts 2375, 2376 (Secured via TLS) but you may specify any Port Numbers that are available in the Linux iptables.
Let’s get started! The steps below to expose your Docker Daemon to the Internet is very easy and straightforward unlike the TLS way of implementation.
—
Edit your docker.service file to accept TCP from any interface (0.0.0.0).sudo vim /lib/systemd/system/docker.service
Then, find for “ExecStart” and replace the string to the line as below:From:ExecStart=/usr/bin/dockerd -H fd:// --containerd=/run/containerd/containerd.sockTo:ExecStart=/usr/bin/dockerd -H fd:// -H=tcp://0.0.0.0:2375
However, if you notice, we have explicitly specified a port with the number of “2375”. Yes, that is the port we are gonna expose the Daemon to.
—
Restart / Reload your Docker Daemon for the changes to be applied successfully.sudo systemctl daemon-reload
sudo service docker restartIf you saw no “Errors”, then you good and gucci!
Your Docker Daemon is now exposed to the Internet. Once again, I wouldn’t suggest this method.
—
Before we get too excited, I have something to tell to AWS EC2 Users. Yes, YOU! Follow the steps below to set the Inbound Rules in your Security Group to allow the Port “2375” to be passed through the EC2.
Head over to your Security Group in the AWS Console, please edit the Inbound Rules for the Security Group as below:
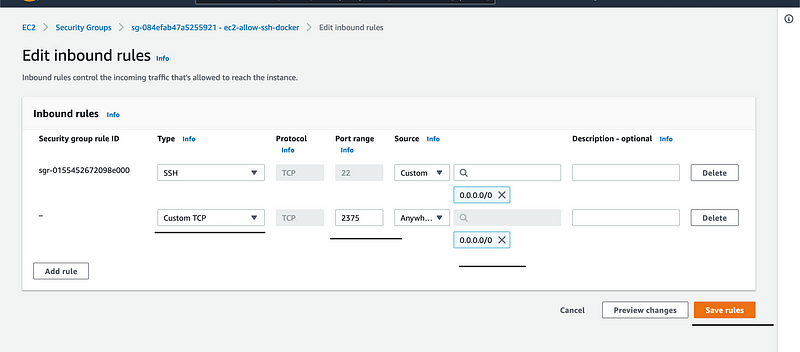
Upon completion of the edit, you are now allowed to party. However, until the point your Docker Daemon is controlled by an unauthorized user. Don’t tell me I didn’t warn, I did.
—
To test out if your Daemon is successfully “Exposed” to the Internet. Simply open a new Browser tab and paste the URL below, of course edit accordingly and add the IP Address of your EC2. The link below is Docker RESTful API btw.
http://IP_ADDRESS:2375/images/json
Output:
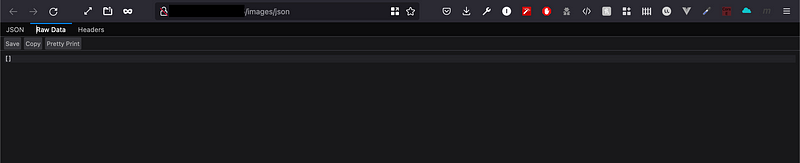
If you are able to see this response from your end, then it indeed is exposed to the world.
— — — — —
Step 6: Securing your Docker Daemon over TLS
TLS? Hmmm. Relax, this isn’t rocket science. Let’s put it this way, TLS is a set of certificates that ensures the security of your connection. By the way, TLS stands for Transport Layer Security. For more information, Google is your friend!
Okay, let’s not derail from the topic.
—
Let’s get right into the game with setting up with the override file. By default, Docker reads the file from /lib/systemd/system/docker.service . In this case, we do not want to write or change the default docker.service file, since we can securely override the file with a new override file.
Are you confused, amigo?
Relax, don’t be so confused. We’ll rationalize this practically.
—
Before we started, let’s generate our TLS Certs. Please be advised that these Certs are unique per Server and it is crucial that the accurate data is being added.
—
Downloading the Script on the Serverwget https://raw.githubusercontent.com/AlexisAhmed/DockerSecurityEssentials/main/Docker-TLS-Authentication/secure-docker-daemon.sh
—
Changing file permission (To executable)sudo chmod +x secure-docker-daemon.sh
—
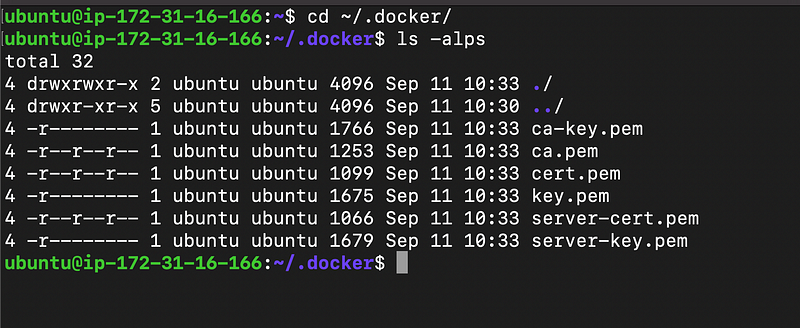
Running the Script on the Server to generate the Cert Files. Please be advised that the Certs will reside under ~/.docker which also converts to the .docker directory inside the current user’s directory.
NOTE: Please keep these files save! They are like passwords, and can do a lot.
—
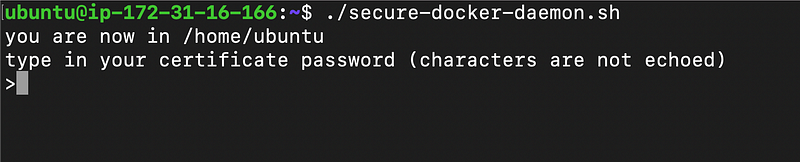
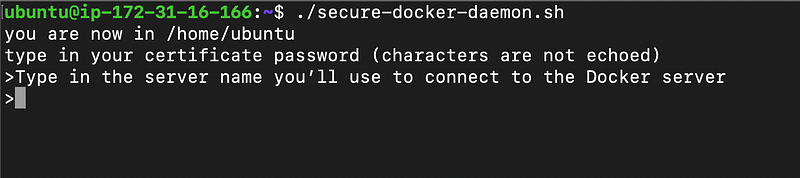
Starting with the script./secure-docker-daemon.sh
—
Please ensure a proper paraphrase / certificate password is used, and most importantly REMEMBER them.
—
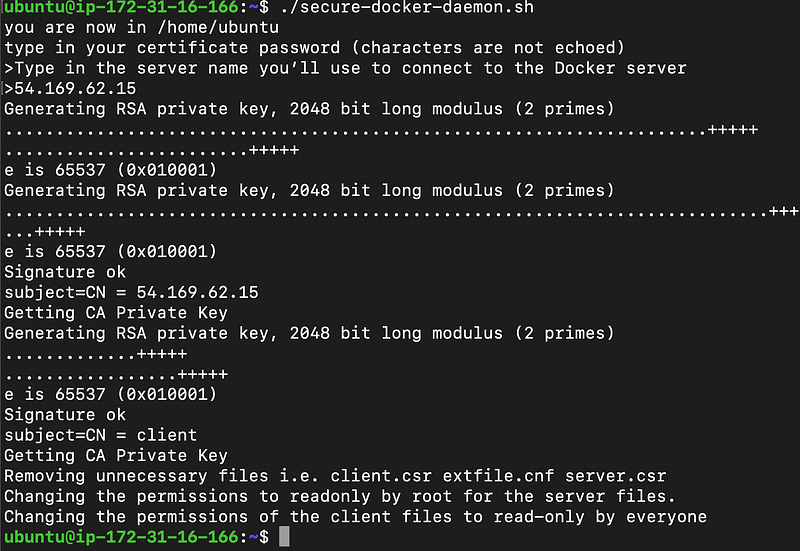
In this field, please ensure you paste in the Servers IPv4 (Public) IP
—
And, we’re done generating the Certificates.
—
Checking if the files are populated
—
Once the required files are generated, now let’s give into the Docker Daemon level of things. Fun stuffs are about to start!
Hang in tight. A little bit more.
—
Let’s now create our override.conf file. This config (service) file is used to override the default configuration of our Docker Daemon Service.Firstly, let's create the directorysudo mkdir /lib/systemd/system/docker.service.d--
Secondly, let's create the config filesudo touch /lib/systemd/system/docker.service.d/override.conf
—
Now, let’s edit our override.conf file.File name: override.confContents:[Service]
ExecStart=
ExecStart=/usr/bin/dockerd -D -H unix:///var/run/docker.sock --tlsverify --tlscert=/home/ubuntu/.docker/server-cert.pem --tlscacert=/home/ubuntu/.docker/ca.pem --tlskey=/home/ubuntu/.docker/server-key.pem --userns-remap="default" --icc="false" -H tcp://0.0.0.0:2376
Explanation:
In this step, we are binding all our Certs that we generated in the previous step to the Docker Daemon Start Command to prepare the files for TLS Verification for any new Clients that are to be connected outside of the Server. If you notice, we’re also exposing the TLS Port of Docker Daemon “2376” to the Internet. However, this expose is safe as Docker will require the Certs for the authentication. In addition to all these TLS Commands, we now have 2 foreign argument called “ — userns-remap” and “ — icc” so our Containers are run with elevated permission. --icc stands for Inter-container Communication, in this case, we have set it to “False”, you may turn it on if you’d prefer it.
All arguments passed through the ExecStart Command is listed on Docker’s Offical Website
Please refer here.
—
Now, that we have successfully edited our override.conf file. Let’s go forward with restart / reloading the Docker Daemon. Same steps as above.sudo systemctl daemon-reload
sudo service docker restartIf you saw no “Errors”, then you good and gucci!
Output:

—
Now, AWS Users, one again. Do not forget to update your Security Group. If you’d like to copy the Certs to a Local Computer, please use rsync .
Here’s a useful Command to copy the files to your Local Computer. This is additonal.rsync -chavzP --progress -e "ssh -i my-keypair.pem" \
ubuntu@IPv4 Address:/home/ubuntu/.docker/ \
~/Downloads/
— — — — —
Step 7: The Finale
If you have either followed the “Secure way” or “Insecure way”. Rest assured, your Docker Daemon should be now exposed somewhere.
You’re now good to go to rock & roll.
Have a great day. Stay Safe. Stay Healthy. Happy Coding & Learning.
—
My Socials
What is a good Article without promoting our Socials?
Just kidding. Let’s get connected.
Linkedln: https://www.linkedin.com/in/raeveen-p/
Twitter: https://twitter.com/raeveen_28
Facebook: https://www.facebook.com/raeveen/
Instagram: https://www.instagram.com/raeveen_28/